COMMON DIGITAL SENSE TECHNOLOGY
A Step-by-Step Guide to Creating a Blog on WordPress

In this post, we’ll walk you through the steps needed to create a quality WordPress blog. Or, if you’d rather follow along with a video, check out this comprehensive walkthrough created.
- Add a new post.
- Add content.
- Format the post.
- Preview the post.
- Publish the post.
1. Add a new post.
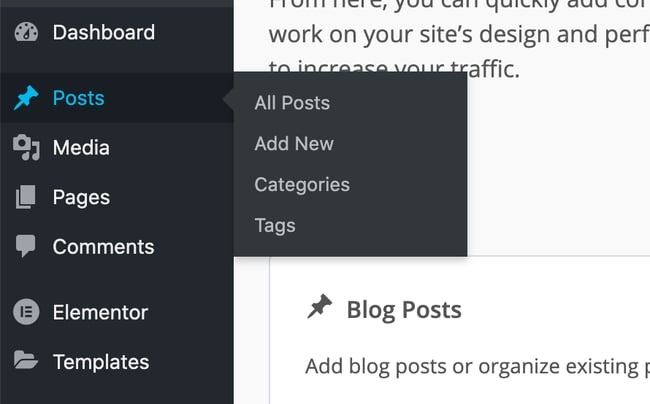
The first thing you need to do to get your WordPress blog off the ground is create a post. We’ve created an example you can follow to help you get started with your WordPress blog. First, log in to your WordPress administrator area and select “Posts” from the menu options on the left. Then, select “All Posts” in the dialogue box that appears.
Pro Tip: As you add more content to your blog, there may be circumstances when you need to select multiple articles simultaneously. To do so, you can select the “Bulk Actions” button on the All Posts homepage.
2. Add content.
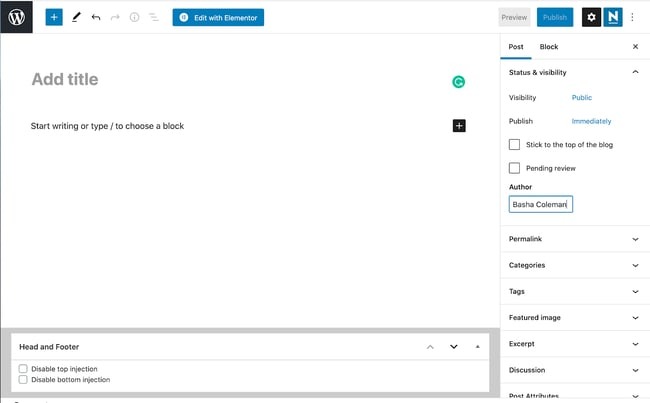
You’ve arrived on the blank canvas where you’ll add your masterpiece (AKA your content). But before starting this process, we have a few pointers. First, be sure to save your work frequently or write it in a separate Google or Word document and copy it over to the content management systems (CMS). This is a wise idea because, while WordPress does save your progress automatically, it might not pick up on changes made if you lose your internet connection. Not to mention, drafting your content in a separate document is good idea so you don’t get overwhelmed by simultaneously formatting, editing, and writing.
Click the “Save draft” button in the upper right-hand corner to save.
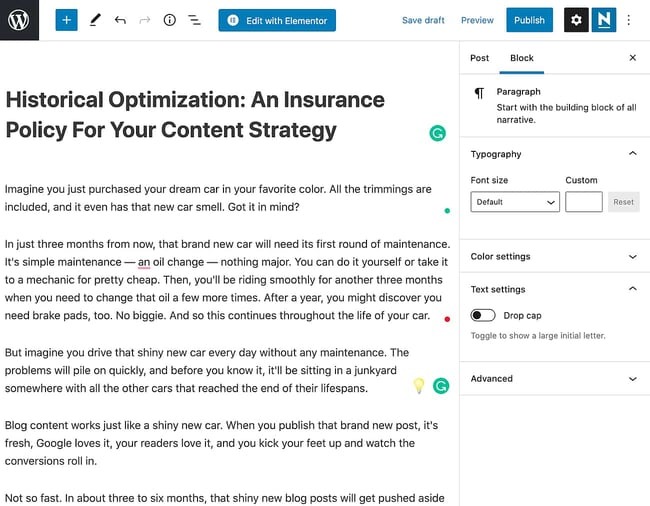
WordPress uses a block editor, which works exactly as you’d imagine — by creating blocks for each section of content you add. For example, paragraphs will be separated into blocks, as will images and headings.
Pro Tip: If you don’t know where to begin, you can peruse WordPress AI plugins to help get your creative juices flowing and streamline the content creation process.
Uploading Images
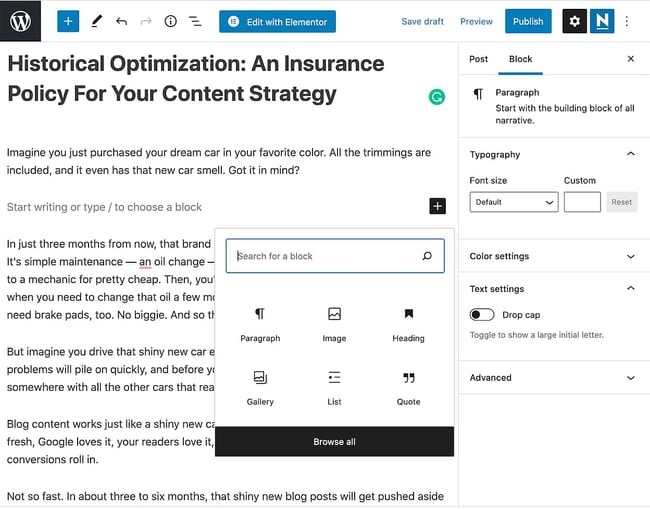
Once you’ve written your first piece, you’ll need to add images to your WordPress blog post. Adding images can make your content more digestible and visually engaging. To begin uploading a picture, press “enter” on your keyboard to create a new block. Then, click the “+” button in the top left corner to view the different blocks. Select the “Image” block.
Now, upload your image. You can either upload one from your computer, select one from the WordPress media library, or insert an image with a URL from a site like Flickr. Don’t forget to add alt text to your image for accessibility and search engine optimization.
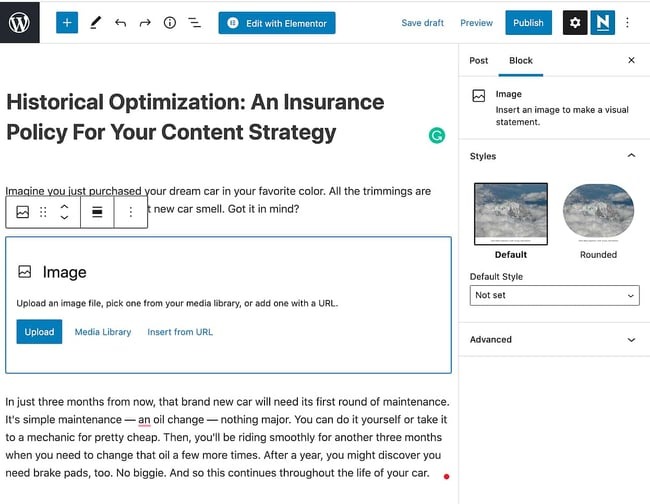
Once you’ve completed this step, your image should be visible in the block. You can repeat this process as necessary — if your article is long, we suggest adding a few images to break up the text and make it more readable.
Pro Tip: People recall 65% of the information they see presented visually, so remember to use infographics on your blog!
Adding Links
Adding internal and external links is essential to boost your blog post quality. The anchor text is also crucial for SEO as it indicates what the page you’re linking to site crawlers is about.
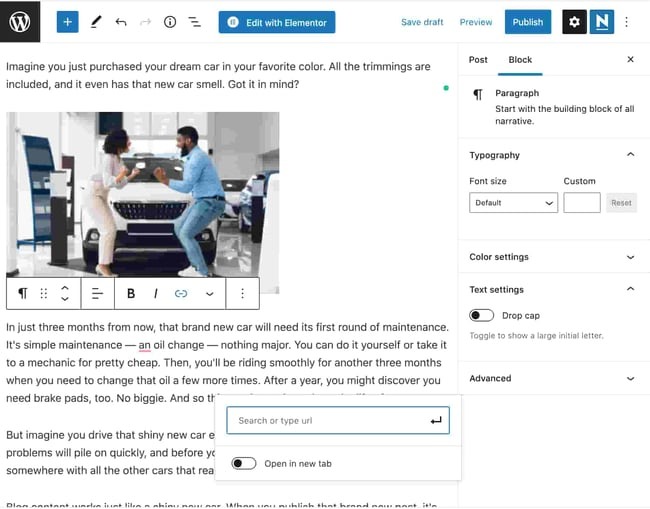
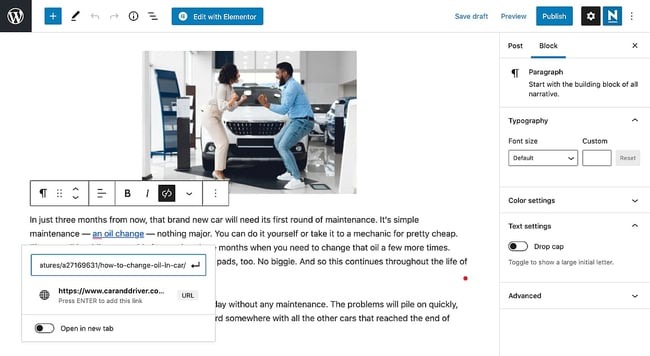
It’s easy to add hyperlinks to your content in WordPress. You can do so in two ways. The first way is to select the text you want to hyperlink. Then, find the floating menu box and select the link icon highlighted in blue below.
Add a URL in the box that appears.
Click “Enter” to insert the URL. And ta-da, you’ve done it!
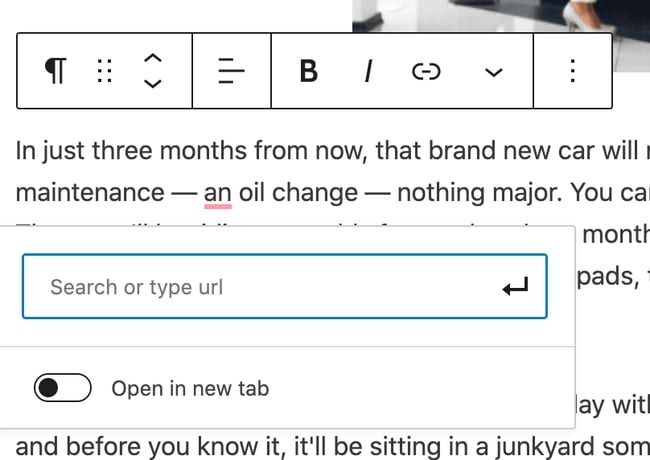
The more straightforward way to add hyperlinks is by using a keyboard shortcut. Start by selecting the text you want to hyperlink.

Then, press Command+K (Mac) or Control+K (PC) to bring up the box and add your URL on your keyboard.
Pro Tip: It’s up to you to decide whether you’d like your links to open in a new tab. Generally speaking, if a link is external, or you’d like the visitor to stay on the page they’re currently on, turn on the option to open in a new tab.
3. Format the post.
Spoiler alert: It’s just as important that your content is organized as it is well-written. Without formatting in place, your audience is more likely to get overwhelmed by massive blocks of text and leave the page quickly (therefore impacting your bounce rate). Here’s how to format your post.
Pro Tip: Readers don’t want to spend time figuring out how to navigate your post, so make it easy for them with clear formatting. We’ll dive into how you can do so now.
Headings
To organize a blog post, use headings. Headings tell the reader (and the search engines) what is essential on the page using a hierarchy. It’s a win-win: Your readers know what to expect, and your site is more findable for search engines. Plus, it allows your readers to better pace their reading experience. And that’s not to mention how it makes your blog post look better aesthetically speaking.
Here’s how it works: An H1 is the title of a page and lives at the top of the hierarchy and the top of the page. A blog post only has one H1. If you add more, you risk confusing Google — and your reader. In other words, don’t do it.
H2s are subheadings. You might have one, two, or more of these in your post. H2s are next in line in the hierarchy of a blog post. They always go below an H1, and if you’re trying to rank for a keyword on Google, it’s a good idea to try to include it in at least a few H2s — without keyword stuffing, of course. H3s follow a similar order — they always go below H2s. Think of an H3 as a subcategory. All subsequent headings follow the same pattern.
Let’s walk through an example. Say you’re writing a blog post about the best dog breeds for families. Your H1 could be: “The 10 Best Dog Breeds for Families.” Your H2s could be: “Why choose a family-friendly dog breed?” and “What are the best dog breeds for families?” Under the second H2, you could elaborate on breeds that are recommended. To do this, add H3s such as “Golden Retriever,” “Labrador Retriever,” “Cavalier King Charles Spaniel.” And under each H3 you may add an H4s such as “Why Choose This Breed” where you can provide additional information.
This results in a more digestible experience for readers and search engines.
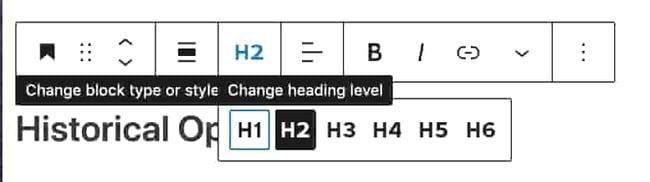
To change a heading in a WordPress blog post, find the menu box and select the paragraph button highlighted in blue.

Select “Heading.” Depending on the CSS settings your site has set up, you’ll see your text change in size and even color. To edit the type of heading, click the “H2” button in the menu box and select the appropriate heading.
Pro Tip: Use headings strategically; they should reveal to your readers what to expect in the following copy.
Images
Images also help readers navigate your blog post, so remember to format them properly. Formatting images in WordPress is easy. Here’s how.
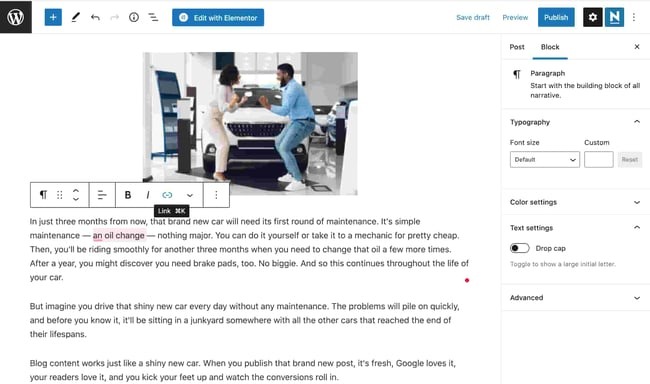
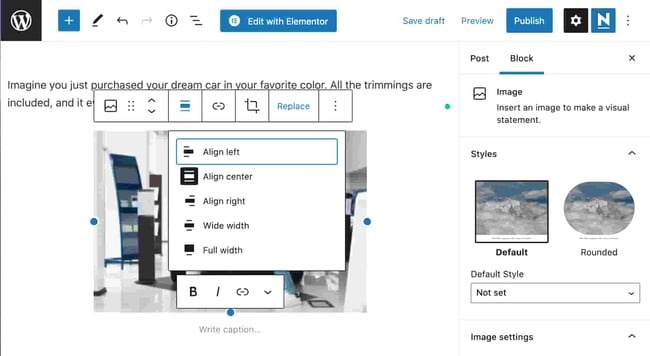
Select your image and find the floating menu box. Next, select the format button — the one with three horizontal lines. Next, choose the alignment you’d like for your image. Here, let’s stick with a center alignment for the photos in our blog post.
Pro Tip: Stay consistent with your alignment so readers don’t get confused when reading your blog posts. If you use center alignment for one photo, commit to it throughout the post so readers know what to expect.
4. Preview the post.
You’ve added content, images, links, and formatting for an optimal user experience. Now, it’s time to preview your post before it goes live. You’re almost there. See? Learning how to create a blog on WordPress isn’t as difficult as it may seem!
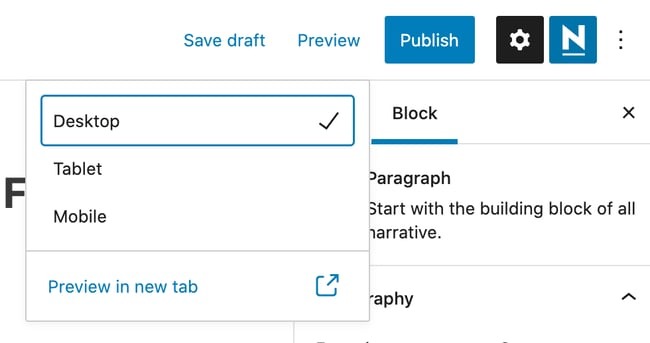
First, select the “Preview” button in the top right corner. Then choose whether you want to preview a desktop, tablet, or mobile version of the post. We chose “Desktop” here. Finally, select the “Preview in a new tab” option.
Take a look at your post for any errors. If you see any, simply return to the editor tab and adjust as necessary.
Once everything looks good, congratulations! You are ready to publish your first WordPress blog post. Now it’s time to preview your post before it goes live.
Pro Tip: Don’t skip the preview step! It can be tempting to rush through to get your post to go live, but resist the urge. Previewing allows you to check for any issues with the content, formatting, or user experience.
5. Publish the Post
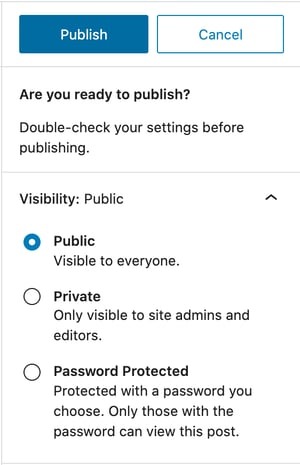
To publish the post, select “Publish” in the top right corner. You’ll see a few different options for publishing, but if you want this post to be available to anyone on the internet, select “Public.”
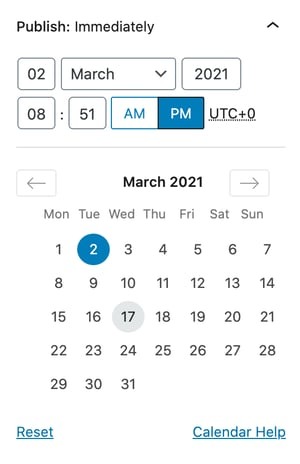
Schedule for a Future Date or Time
Next, it’s time to choose whether you’d like your post to go live immediately or at some point in the future. You can choose to publish it immediately or schedule it for later. If you schedule your blog post, it will automatically go live on that date at that time. If you have an editorial calendar you’re sticking to, this will prove invaluable.
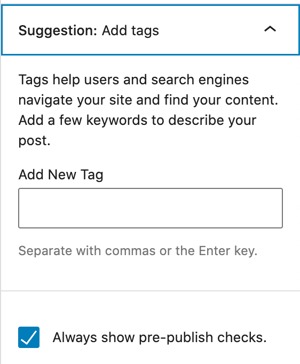
Add Tags
Finally, you’ll have the opportunity to add tags to your post. These help readers navigate your posts by similar topics. This is optional, so you can leave them blank if you don’t yet have a process to organize tags.
Add Tags
Finally, you’ll have the opportunity to add tags to your post. These help readers navigate your posts by similar topics. This is optional, so you can leave them blank if you don’t yet have a process to organize tags.
our blog post is now live on the web!
Pro Tip: As your blog grows and you publish more articles, you’ll find it’s increasingly important you add tags so visitors can easily peruse your content. It will also be helpful for you as you navigate through your content and add related links. And once you figure out how you’d like to organize tags, don’t forget to go back and add them to older content.
FAQ
What To Do When You’re Locked Out Of WordPress Admin?
If you’re locked out of your WordPress admin area, here are steps you can take to regain access:
1. Reset Your Password:
- Go to the WordPress login page and click on “Lost your password?” Follow the instructions to reset your password via email.
2. Check Your Email:
- Ensure that you’re checking the correct email address associated with your WordPress account. Look for password reset emails in your spam or junk folder.
3. Use phpMyAdmin to Reset Password:
- Log in to your hosting account’s control panel and access phpMyAdmin.
- Select your WordPress database.
- Find the `wp_users` table, locate your user account, and edit the user record. Change the `user_pass` field to a new password, using the MD5 function to encrypt it.
4. Edit the Functions.php File:
- Access your site’s files via FTP or your hosting provider’s file manager.
- Navigate to `wp-content/themes/your-theme/` and open the `functions.php` file.
- Add the following code to create a new administrator user:
- Save the file and then remove the code to avoid security issues.
5. Deactivate Plugins:
- Sometimes, a plugin conflict can cause login issues. Rename the `plugins` folder via FTP or your hosting file manager to deactivate all plugins. If you can log in afterward, reactivate plugins one by one to find the culprit.
6. Check .htaccess File:
- Sometimes issues with the `.htaccess` file can cause login problems. Rename the `.htaccess` file and try accessing the admin area. If successful, you may need to regenerate the `.htaccess` file by going to Settings > Permalinks and clicking “Save Changes.”
7. Check File Permissions:
- Ensure that your WordPress files and directories have the correct permissions. Incorrect permissions can sometimes cause login issues.
8. Contact Your Hosting Provider:
- If none of the above steps work, reach out to your hosting provider for assistance. They may be able to help you regain access to your WordPress admin area.
Following these steps should help you resolve most issues related to being locked out of your WordPress admin area.
How To Fix The HTTP 500 Internal Server Error
Refresh the Page: Sometimes a simple refresh fixes the issue.
Clear Browser Cache: Clear your cache and cookies to remove any corrupted files.
Check .htaccess File: Rename .htaccess to .htaccess_old and regenerate a new one by saving permalinks.
Increase PHP Memory Limit: Add define('WP_MEMORY_LIMIT', '256M'); to wp-config.php.
Deactivate Plugins and Themes: Rename the plugins folder and switch to a default theme to identify the cause.
Check File Permissions: Ensure directories are set to 755 and files to 644.
Review Error Logs: Check server error logs for details on the issue.
Repair WordPress Database: Add define('WP_ALLOW_REPAIR', true); to wp-config.php, then visit the repair page.
Reinstall WordPress Core Files: Upload new WordPress files, excluding wp-content and wp-config.php.
Contact Hosting Provider: Seek support from your hosting provider if the issue persists.
What Are The Benefit Of WordPress
User-Friendly: Easy to use with an intuitive interface.
Highly Customizable: Extensive themes and plugins for tailored design and functionality.
SEO-Friendly: Built-in tools and plugins to optimize for search engines.
Flexible and Scalable: Suitable for everything from small blogs to large e-commerce sites.
Open Source: Free to use with a supportive community and regular updates.
Is WordPress Secure?
WordPress is generally secure, but its safety largely depends on how well you manage and maintain it. The platform itself is regularly updated to address vulnerabilities, and using reputable plugins and themes further enhances security. Implementing strong passwords and employing security plugins can provide additional protection, while regular backups ensure you can quickly recover if something goes wrong. While WordPress has robust security measures, it's essential to stay proactive in maintaining and securing your site to minimize risks.
How Good Is WordPress SEO
WordPress is well-regarded for its SEO capabilities. The platform offers a range of built-in features and plugins that facilitate effective search engine optimization. It provides customizable permalinks, easy-to-manage metadata, and robust content management tools. Additionally, popular SEO plugins like Yoast SEO and All in One SEO Pack offer advanced functionalities to optimize your site's content, improve readability, and manage sitemaps. With proper configuration and the use of these tools, WordPress can significantly enhance your site's visibility and performance in search engine results.
How do I create a new page?
When you log into your WordPress website use the dashboard menu to navigate to Pages > Add New. From here you can give your page a name, add content, media, insert shortcodes or even use a page builder to create something custom.
What is a CDN?
CDN stands for Content Delivery Network. The CDN stores copies of your website content (specifically images, Javascript and CSS files) and delivers it to your readers using a network of servers around the world. This way when readers visit your website data is loaded from the server closest to them. CDNs also tend to have very fast response and loading times with minimal downtime.
If you want to test a CDN to see if it would help your web speeds, It’s a great place to start without having to invest a chunk of change up front.